Advantages of the Sage Starter Theme for a Modern Web Development Workflow With WordPress
When it comes to WordPress themes and web development, the basics have remained relatively unchanged over the years. When you visit the official WordPress theme development docs, you’ll learn about fundamental concepts like The Loop, the WordPress Template Hierarchy, and how actions and filters can be used to modify plugins and other PHP code.
What you won’t learn is how WordPress works with a modern web development workflow.
So, what do we mean by using a modern web development workflow with WordPress?
In this post, we’ll be talking about using a modern web development workflow with the Sage WordPress starter theme. We’ll start by covering the basics of starter themes and then dive into what makes Sage different and how to get started using it.
What We’ll Cover
Comparing Starter Themes and Theme Frameworks
Sage was created out of the simple need to make modern tools available for WordPress theme development.
Before we cover Sage in more detail, it’s helpful to understand why Sage was created and how it compares with other options available for WordPress theme development or customization.
Custom WordPress themes are typically built from a starter theme or by creating a child theme using a theme framework or parent theme. Each of these options presents challenges and downsides.
Theme Frameworks and Parent Themes
Creating child themes can be tedious work. Child themes pose limitations on customization because changes must be considered with respect to the established styles and functionality of the framework or parent theme.
In that sense, you’re tied to the framework or parent theme, and you don’t have the same flexibility as you do when starting a new theme from scratch.
Child themes often result in poorly organized code and become increasingly difficult to maintain as more complexity is introduced to a project over time.
Starter Themes
Sage was initially released in 2011.
Other starter themes were also beginning to pick up steam around this time. Underscores by Automattic, arguably one the most popular WordPress starter themes, began under the name “Toolbox” in 2010. Underscores describes itself as a 1,000 hour head start on theme development.
Underscores comes with HTML5 boilerplate, some starter CSS, optional sample header and navigation setup, and some small tweaks made in functions.php to improve theming experience.
These tools are still typical of what most WordPress starter themes offer.
Why Sage?
While theme frameworks and starter themes may provide a head start to theme development and customization, neither option provides a comprehensive set of modern tools for web development.
For example, a typical starter theme may offer a CSS framework and a minimal workflow for organizing template files, but we’re still left without any actual build process to compile frontend assets, a necessity for a modern frontend development workflow.
A frontend build process typically includes packages and tools for managing development dependencies, compiling and bundling JS and CSS, image compression, synchronized browser testing and much more.
Sage covers most of what you’ll find in other starter themes but also includes modern frontend tools like those mentioned above as well as many others.
Additionally, Sage comes with backend tools including the Laravel PHP framework and Blade templating engine, making it possible to write more readable and elegant PHP and use template inheritance to add modularity and improved organization of your template files.
If Underscores is a 1,000 hour head start, Sage is a 10,000 hour head start.
Sage is part of Roots, a set of tools for modern WordPress development with the simple goal of helping you build better WordPress sites.
Sage goes above and beyond what other starter themes offer by making a modern web development workflow available by default when you start a new project.
The Roots community embraces the open-source ethos and has created an entire community of conversation around what modern web development should be and how to continuously improve Sage and other Roots projects.
This means that through its team and community Sage is continually finding ways to provide better open-source tools that cover the full WordPress stack for modern web development.
Broadly speaking, compared with other starter themes or other development workflow options available, Sage provides much better tools to help developers:
-
Follow best practices by default
-
Make fewer errors
-
Write more modular and maintainable code
-
Remove complexity
-
Save time
-
Optimize for speed and performance
Sage and the Modern Web Development Workflow
Next, we’ll look at the specific frontend and backend development tools that come with Sage and why these tools make Sage one of the best choices for WordPress custom theme development.
Frontend Development Tools
What do we mean by frontend development tools?
When we use the term frontend, we’re referring specifically to tools that help developers write and deploy code that runs in the browser: JavaScript (JS), CSS, and HTML.
Some of the usual suspects here include CSS preprocessors, static module bundlers for compiling assets and managing dependencies, version control, modern JS syntax and features, third-party JS libraries, linting to catch JS and CSS errors, synchronized browser testing and more.
So, what are some of the specific frontend development tools that come with Sage?
The list below is not exhaustive, but covers some of the fundamental frontend tools provided with Sage.
-
Webpack to resolve all JS and CSS dependencies in your project and generate static assets for optimal performance
-
ES6 (as of the time of this writing) for writing modern JS with the latest syntax and features
-
NPM for easily installing third-party packages and open-source JS libraries for development (many of which are listed below and are installed by default in any new Sage project)
-
Autoprefixer for automatically adding vendor prefixes to CSS rules
-
Browsersync for synchronized browser testing
-
Sass for maintainable and better organized styles
-
Your choice of popular CSS frameworks like Bootstrap with ready-to-use classes
Backend and Theme Development Tools
Sage also enhances the developer experience when it comes to organizing your theme file structure as well as helping you write better PHP, the core language of WordPress necessary to request data in your theme and plugin files and process that data into HTML.
Sage includes only a few tools here, but once you get started with Sage you’ll soon realize they impact many aspects of theme development and greatly improve the developer experience.
-
Modern PHP and requirements, along with PHP Standard Recommendation (PSR) coding standards (the most widely used and accepted coding standards used in the PHP community)
-
Better template file organization using a Model View Controller (MVC) design pattern rather than simply creating a bunch of template files in your theme root
-
Laravel’s Blade templating engine making it easy to follow Don’t Repeat Yourself (DRY) principles and practice template inheritance inside your theme template files
Getting Started with Sage
Now that we’ve covered some of the tools that come with Sage, let’s talk about getting started. The good news is that Sage does all the heavy lifting to configure and setup your development workflow, making it easy to get started using these tools right away.
Sage provides an option to use Bedrock for configuration and plugin management and Trellis for local development and production servers.
We aren’t going to cover the specifics of how you setup your local development environment for WordPress, but as of Sage 9 and the time of this writing, you’ll need a WordPress site running locally on PHP 7.1.3 or later to get started.
If you haven’t checked out Local by Flywheel, we highly recommend this as an option to quickly spin up a local WordPress site.
System Requirements
Once your local WordPress site is ready, installing Sage is pretty simple.
First, you’ll need to make sure your machine meets a few requirements.
As of Sage 9 and the time of this writing, you’ll need to be have Node.js version 8.0.0 or higher installed. Refer to the docs for the latest dependencies required for installation.
Node.js is a JS runtime environment that comes with Node Package Manager (NPM) for easily installing 3rd party packages and JS libraries in your project.
You’ll need to download and install composer. Composer is PHP’s dependency manager and it’s used to install Sage.
You’ll also need to install yarn. Yarn is an NPM client replacement that is required by Sage to install initial dependencies and also run the commands to build the frontend assets on your site.
Theme Installation
Once those requirements are out of the way, from the themes directory you’ll run the following command to install Sage with composer, replacing your-theme-name with the name of your theme.
composer create-project roots/sage your-theme-name
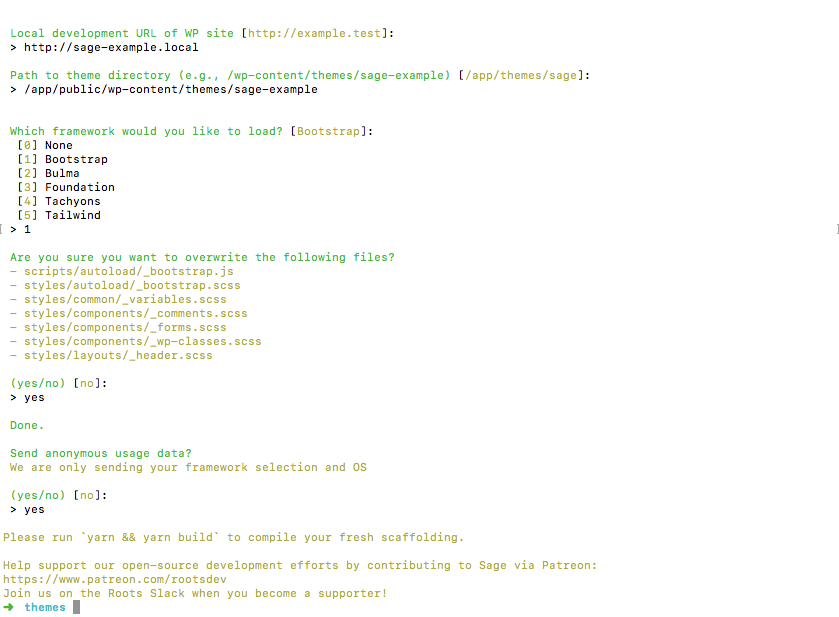
You’ll get a few prompts in the terminal asking for a few details to setup your theme as well as the URL for your local development and path to your theme directory.
Frontend Options
Then, you’ll be asked to select some frontend options.
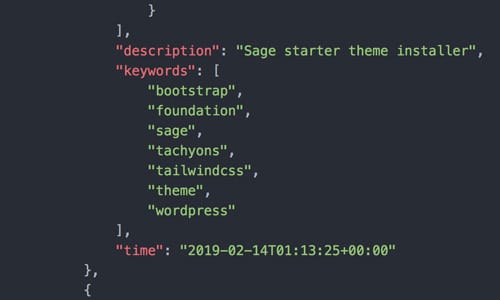
You’ll be able to choose a CSS framework. Sage comes with Bootstrap by default but you can replace it with Bulma, Foundation, Tachyons, Tailwind, or a blank slate upon installation.
Theme Activation
Once you’ve finished selecting all your options and Sage is installed, you can go to WP Admin to activate your theme.

Building Frontend Assets with Webpack
You’ll still need to complete a few steps in order to get your Sage theme showing in the browser.
First, you’ll need to install the initial project dependencies in order to run the build process to get Sage showing up in the browser.
You can do this by going to your theme root and running yarn. If you’re familiar with NPM, you can think of this as the yarn equivalent of npm install.
Now, run yarn build to compile and optimize the files in your assets directory.
Since you’re running the build process for the first time and you haven’t added any styles or JS yet, you’ll just see a bare-bones starter site at this stage. But it’s good to familiarize yourself with this command and check that everything is working.
When you’re ready to compile assets for production, you can run yarn build:production.
Under the hood, what’s going on here is that webpack is resolving your CSS and JS dependencies to minify your files and bundle them into a single JS and CSS file in a dist directory used for production.
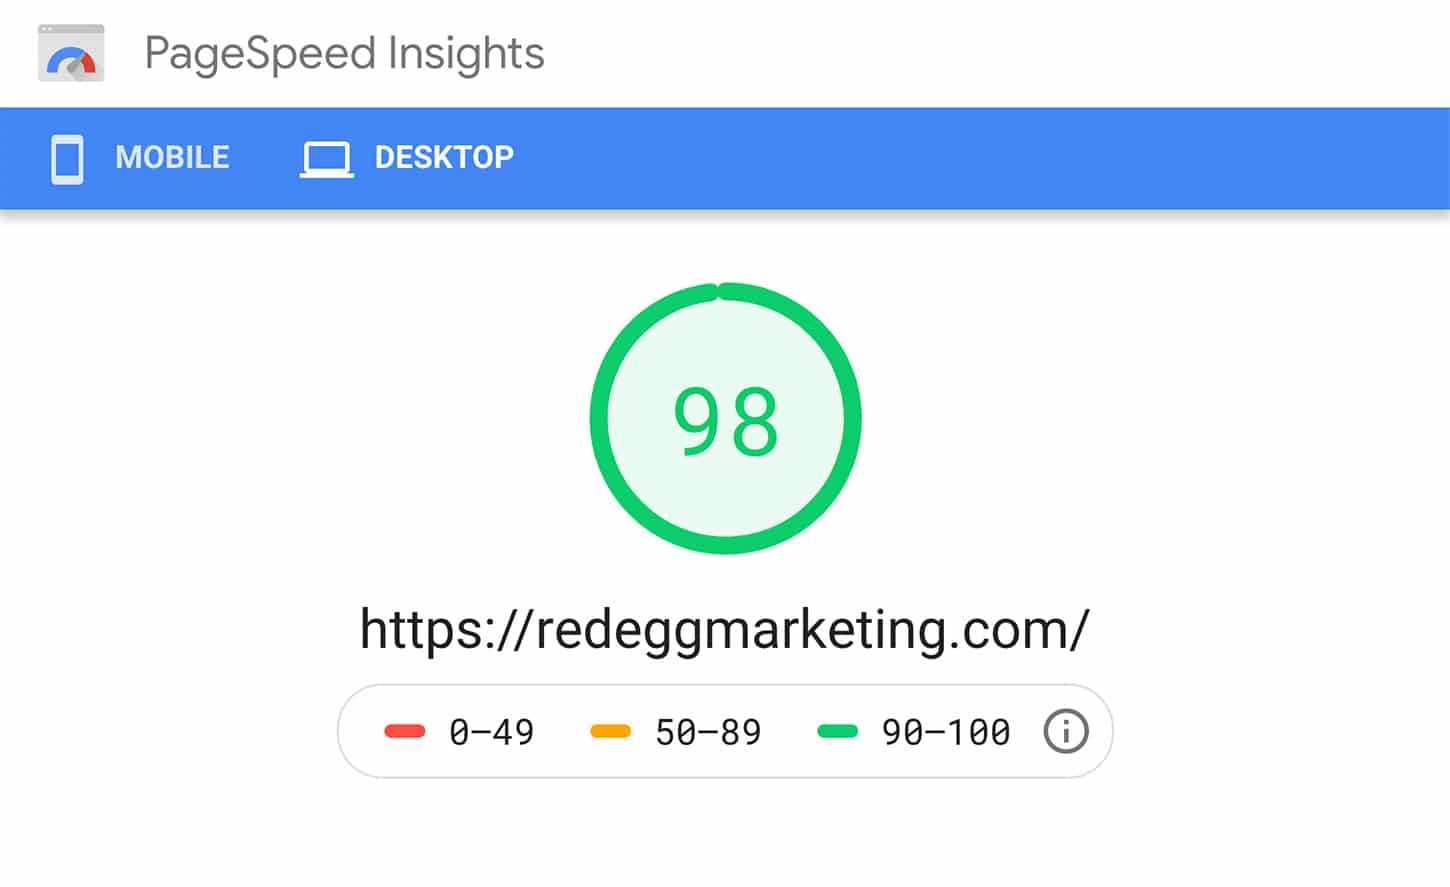
Running this process at build time makes Sage sites load pretty fast!
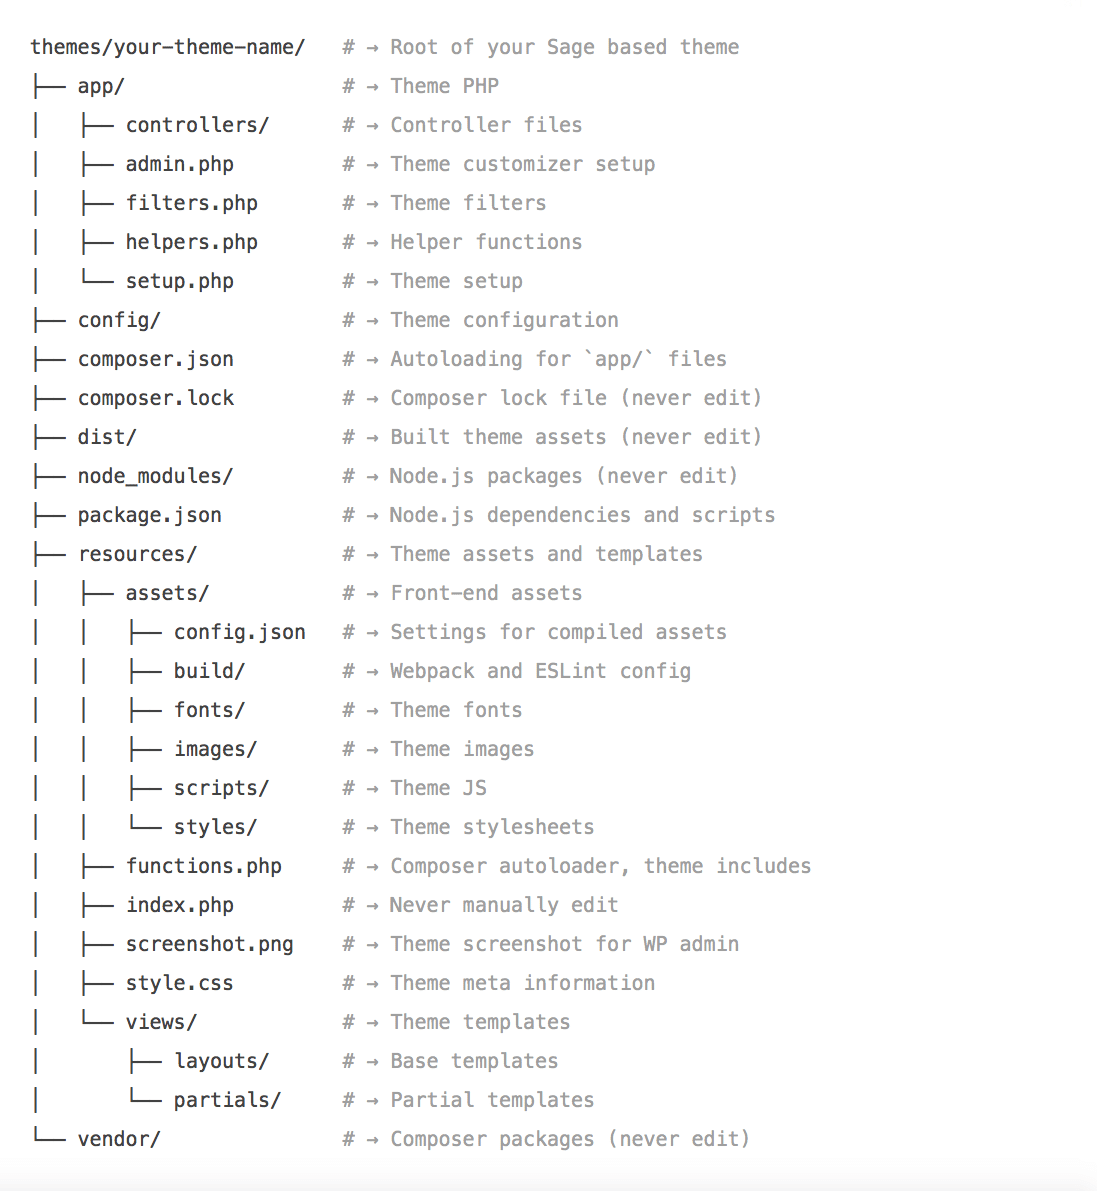
Theme Structure
The Sage theme structure looks a little different than your standard WordPress structure.
Controller
One of the main differences is that Sage includes a folder specifically for using Controller, a plugin that offers a method for passing data to templates.
The files in your app/Controller folder allow you to setup and organize data you intend to use in specific templates.
You can get started with Controller very quickly just by following the conventions used in the sample files. You simply need to extend the Controller namespace by using a class name that matches the name of your corresponding template file, and then setup some some functions to return the specific data you need.
Any data you’d like to make available everywhere on your site can be setup in the App.php Controller file. Typically this might include data like your site title, your log, or perhaps company information used in the footer on every page of your site.
We’ll look at a more detailed example of using Controller a bit later when we cover Blade templates.
Styles
Sage organizes all your assets and theme templates into the resources folder for better organization. Let’s talk first about styles.
Sage comes with Sass.
If you haven’t used Sass, this guide to Sass provides a good overview of Sass principles and concepts to help you unlock the power of Sass! Sass will save you valuable time and make your styles more modular and much more maintainable.
You can add styles by working within the .scss files in the resources/assets/styles directory, or by creating new files and importing them to main.scss.
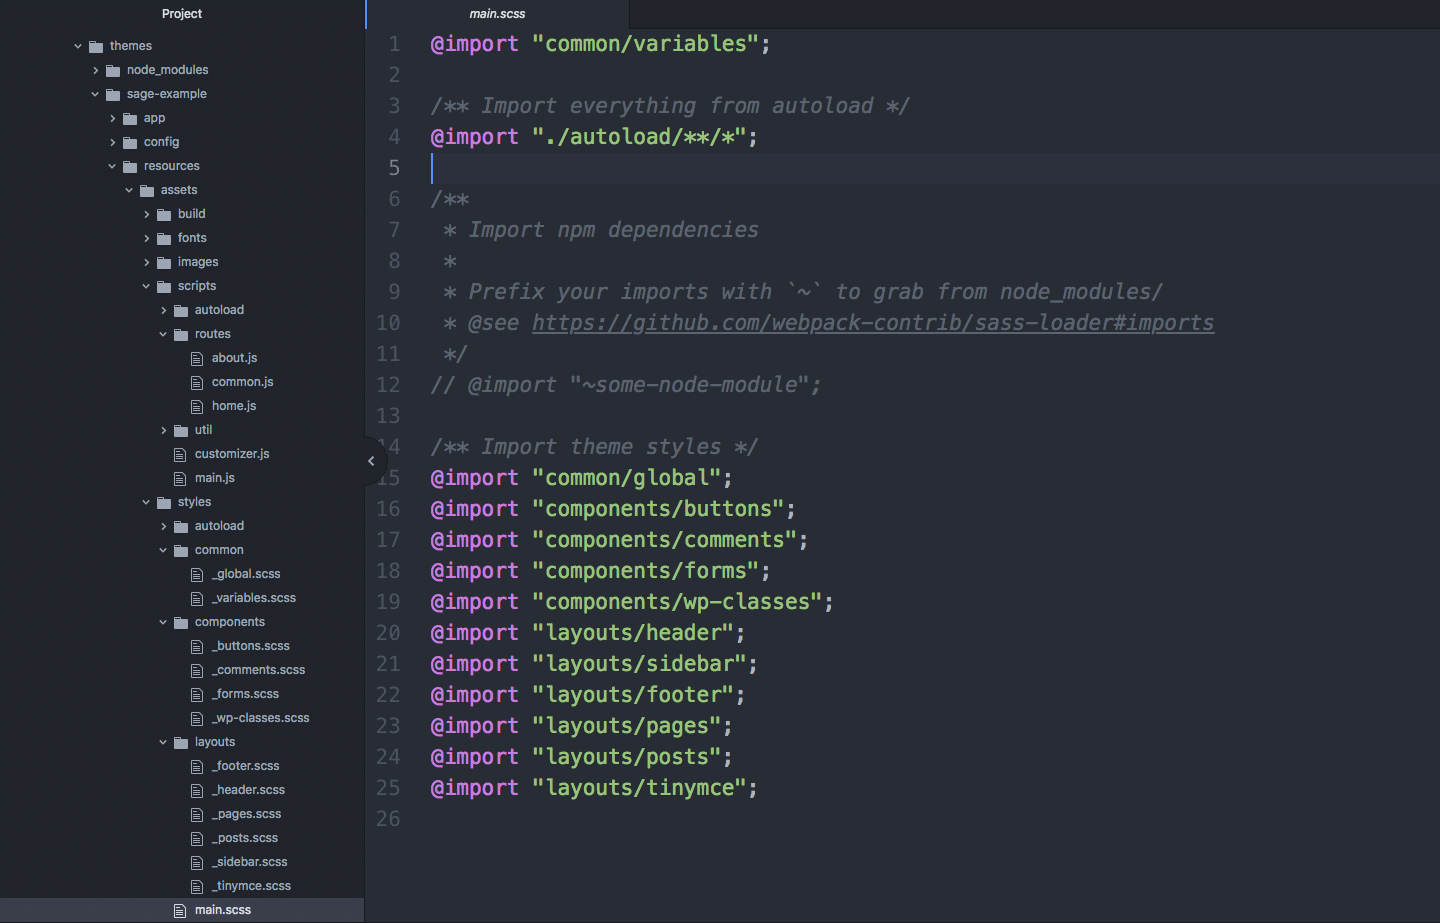
You’ll find some minimal styles and a few helpful instructions in the starter .scss files included with a new install of Sage.
For example, there are instructions on how to import NPM dependencies in main.scss. The NPM registry is a repository of over 350,000 open-source packages that will save you tons of time.
Use them!
You can find an NPM package for just about everything. Using a lightweight library that just requires a little configuration or adding a few lines of code is extremely helpful when you need to create interactive or complicated UI elements.
Using a package is typically as easy as running npm install package-name or yarn add package-name where package-name is the name of your NPM package.
Note
You should always install NPM dependencies from your theme root.
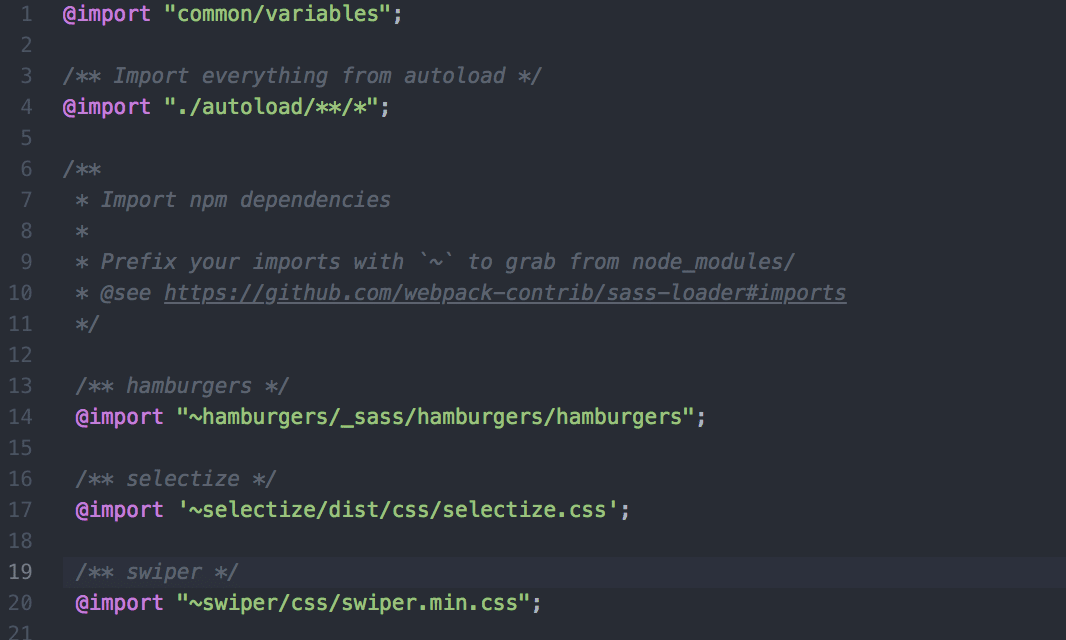
For CSS dependencies, after installing the package you typically just need to import the dependency into main.scss as shown below.
Boom! Now you’re ready to start using the package to create something awesome.
Views
The resources/views directory is for managing all your theme template and presentation logic. You’ll place any page, post, or archive templates here.
Sage uses Laravel’s Blade templating engine for template inheritance, making it easy to create re-usable templates that can be called by any other template. These re-usable templates are called partials.
Inside views, you’ll find a resources/views/layouts directory for managing base templates. Base templates are a wrapper used for each template. They can be called by any template and typically consist of the common components that appear on every page such as a header, container for content of page, and footer.
Sage provides some boilerplate for these making it very easy to get started using them and understand how they work.
The resources/views/partials/ directory is where you place your template partials, or re-usable template parts responsible for presenting specific sections of your site.
Calling partials from templates is so easy there’s really no reason not to.
Here’s an example.
Let’s say you have a partial responsible for displaying an image gallery.
The partial file, which lives in
resources/views/partials, is namedimage-gallery-slider.blade.php.To call this partial in a template, you’d simply add this line of code:
@include('partials.image-gallery-slider')
It’s that simple!
Hopefully this example illustrates how using partials can begin to make your templates much more readable.
Instead of scrolling through line after line of code to get an idea of what’s happening in a template, we can quickly glance at what partials are called and, assuming the names are logical and descriptive, we should get a concise representation of how the template is organized.
When you need to update the view generated by a partial, you’ll simply make your changes once in the partial, and any template that calls it will reflect your changes.
Takeaway
Template inheritance makes it easy to practice Don’t Repeat Yourself (DRY) principles so you should never have to write or modify the same code twice, saving you valuable time and providing an elegant system for organizing the presentation and structure of your templates.
You may have noticed a few special things happening in our previous example.
Specifically, our template file used the extension .blade.php and we used @include in order to call the partial from our template.
One of the advantages of Blade is that comes with a powerful set of Blade directives. These directives provide special syntax for writing more elegant PHP. This removes complexity from your code and makes it more readable.
Next, we’ll provide some practical web development examples of using Blade in your project. This will demonstrate some of the advantages of Blade and show you how to navigate between WordPress, Controller, and your view templates to keep your Sage project organized.
Using Blade with Sage
One of the fundamental ways Blade helps us remove complexity and improve the readability of our PHP is through directives. Blade directives provide special syntax for writing expressions and control structures that are more readable and elegant than their PHP equivalents.
Blade Directives
Blade comes with many handy built-in directives that cover commonly used PHP patterns.
Let’s look at a simple example.


As you can see, the Blade directive syntax is much cleaner.
The difference in complexity and appearance may not seem significant in this simple example, but as your presentation logic becomes more complex and your template files get longer, Blade directives make them much more concise and easier to maintain or update.
Along with Blade directives for expressions and control structures, similar syntax is provided to allow you to wrap your templates in layouts as well as call sections and partials defined in your theme.
Here’s an example of a default page template to illustrate how these directives can eliminate visual noise in your templates.
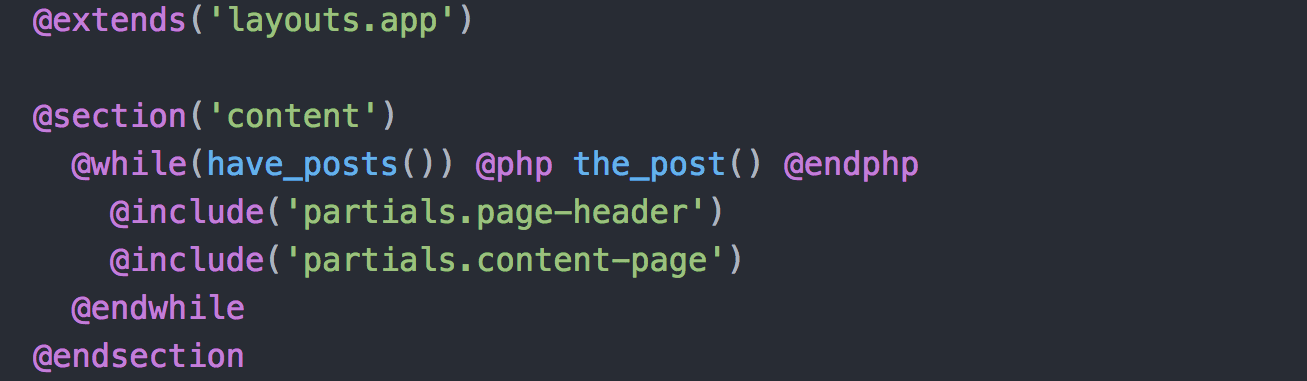
For larger projects, you can even create custom Blade directives for specific blocks of code you might find yourself repeating frequently in your templates.
Takeaway
Blade directives remove complexity by abstracting away visual noise in your code and making your templates much easier to read and understand.
Controllers, Views and Partials
These are the fundamental building blocks in Sage for organizing your data and presenting it in your templates, or views.
Earlier we mentioned that Blade directives reduce the visual complexity of your templates and make them more concise and readable.
Controllers also remove complexity from your templates by providing a separate space for organizing and setting up your data to be used in your views. This provides an Model View Controller (MVC) pattern for development.
Without any type of PHP framework or MVC pattern, it can be confusing to figure out where to setup your data in a WordPress theme. This can sometimes lead to an incredibly disorganized mess of PHP and HTML code inside your theme templates.
Often times during the web development process, you’ll need to perform some work on your data in order to make it useful in your templates. In Sage, this work can take place in Controllers.
Controllers allow to you to focus on setting up your data so you can focus purely on presentation within your views and partials for better organization and separation of concerns when developing your theme.
An Example Using Custom Post Types (CPTs) and Advanced Custom Fields (ACF)
In this example, we’ll illustrate how two commonly used tools for custom WordPress theme development – Custom Post Types (CPTs) and Advanced Custom Fields (ACF) – might be used in Sage when creating a CPT archive page template.
Let’s say we we’re creating a CPT archive page and we’re using using a custom WP_Query that runs based on a search filter that can be submitted by the user on the archive page.
While we’ll just be covering some general concepts about working with Sage, this example is based loosely on the approach we took for creating our own case studies archive page.
As you might expect, we’ll need to write a bit of code to setup the custom query as well as format and store the results in a way that makes them usable in our view.
We won’t focus on the search filter and running the WP_Query, as those are outside the scope of Sage, but we want to give the example a relatable WordPress scenario and common pattern that might be used in Controller for passing data in Sage.
Let’s start out by generally describing how we’ll be using a Controller, Partial and View in web development in this example.
-
Controller
-
We’ll create a Controller file named
ArchiveCaseStudy.phpto get the list of CPT posts that we want to display on our CPT post archive page. In this case, we’ll imagine we’ve defined a CPT called case studies and that we want to display a feed of those case studies on our archive page.
-
-
Partial
-
We’ll create a partial called
case-study-feed.blade.phpthat will define how we’d like to display the case study feed section that will go on our archive page.
-
-
View
-
We’ll create a view called
archive-case-study.blade.php(note the name matches the name of our Controller but with dashes rather than camel case) and call our partial at the place we want to display the feed of case studies within our view.
-
Setting Up Data in Controller
Let’s imagine that we need some basic information about each case study, such as the title and permalink. Let’s also imagine we’ve previously created some ACF fields for each case study that contain some custom information we want to show for each one in our feed.
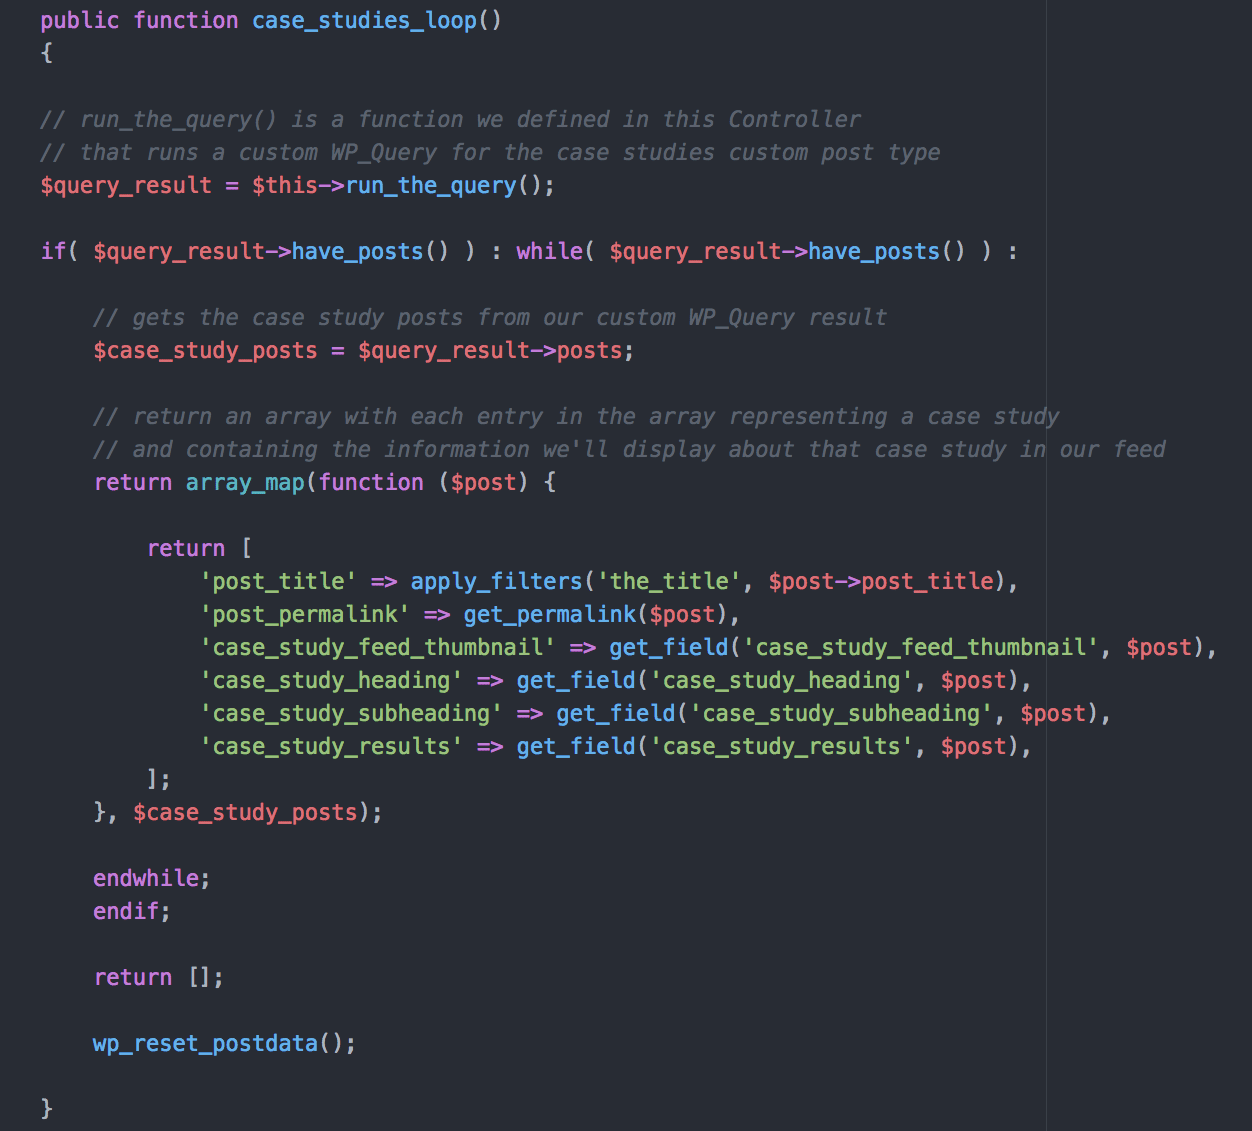
We’ll setup a function in our Controller that gets the query results containing our list of case study posts, loops over each post, gets details about each post, and puts those details in a new object stored in an array. Each object in this new array will represent a post containing the details we need.
If we have posts, we’ll return the array as described above. If not, we’ll return an empty array. By setting up the case_studies_loop() function in our Controller, we make it available in our view template case-studies-archive.blade.php or in partials called from that template.
Our full ArchiveCaseStudy.php file will be much longer than the snippet below, but this is the function that gives us what we need to make our data available within our view, which in this case is our CPT archive template.
Create a Partial to Display the Feed
Next, we’ll create a partial that defines how the list of case studies will be displayed on our CPT archive page.
We’ll access the case_studies_loop() results from our Controller and determine how to include that data within the actual HMTL used to present the case study in our feed.
In this case, we’re imagining we might show the title of the case study and maybe some custom headings or a summary of the results from the custom fields we’re using.
First, we’ll check if the query returned any case studies posts to display. If it did, we’ll loop through the results and display some information for each post. If not, we likely won’t want to display the feed but rather some message to the user that no matching posts were found.
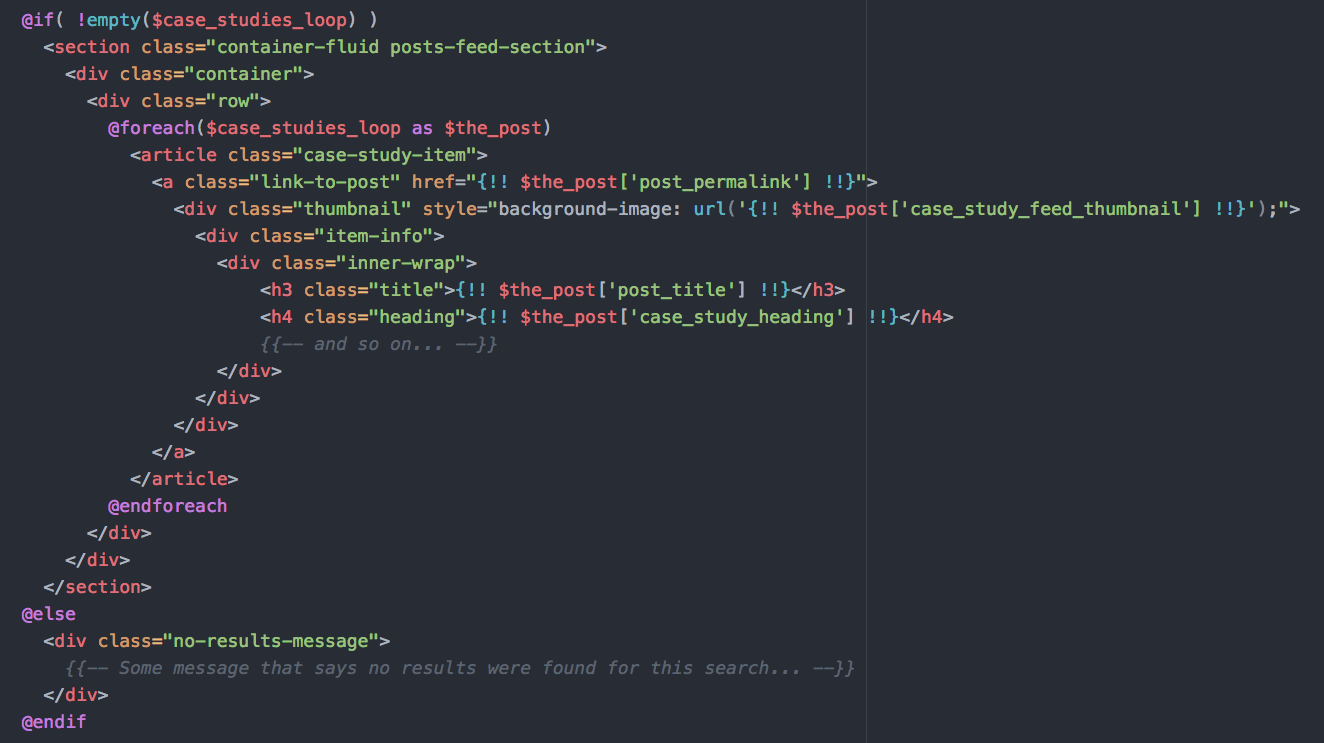
First, you’ll notice that Blade directives @if and @foreach help make it easy to immediately discern what’s happening here. This makes it easy to read and understand what’s being presented inside the control structures we’re using.
You’ll also notice that Blade offers some special syntax to quickly echo a PHP variable with:
{!! $var !!}
We can present the case studies any way we like, but the point here is that we have a nicely defined structure and very easy way of passing in our data where we need it.
Calling the Partial in Our View
The last step is to call our partial case-study-feed.blade.php into the view used for our case study archive page, archive-case-study.blade.php.
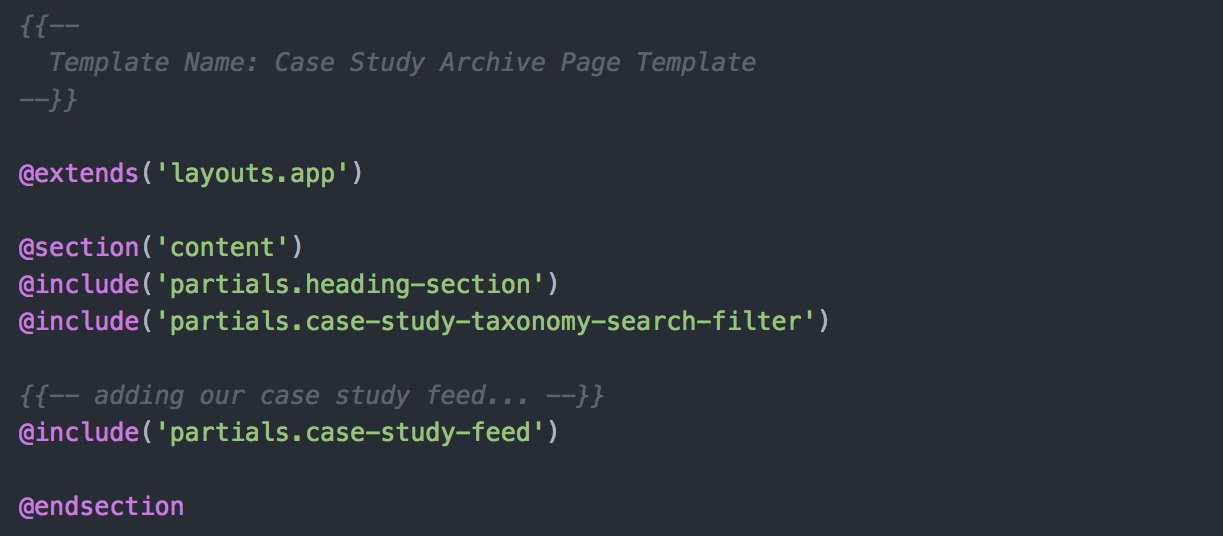
In this example, we’re imagining we might have set up partials for a heading section at the top of our archive page and a custom taxonomy search that users will use to filter what case studies are displayed in our feed.
Now, when the page loads, the query results are returned in the function we added to our Controller. If the query returned a list of case studies, our partial will render the layout needed to display each case study in the feed. Finally, by calling the partial in our view, we determine where on the archive page our case study feed is displayed.
Using ACF with Partials and Views
If you make custom fields available on pages or posts for settings like alignment, color, or other styles, you can pass this data to your partials and views in order to allow admin users more flexibility to have control over certain aspects of appearance and layout.
This also helps make your partials more extensible and results in fewer total files (and more DRY code), removing clutter both for admins and developers and making sections of your site more modular.
You can really allow admins as much or as little control over design as you’d like, and striking the balance between how much of the presentation is pre-determined by your views rather than by admins will likely vary project to project, but working with Sage and custom fields makes it possible to customize the experience for admins and clients while neatly organizing that logic into your web development theme.
Summary
We’ve covered a lot of the advantages to using the Sage starter theme for a modern web development workflow with WordPress.
Sage includes a full suite of frontend web development tools that other starter themes typically lack. It includes NPM for third-party packages. It comes with webpack as static module bundler for managing dependencies and compiling CSS and JS to help you make faster WordPress sites by default. It also includes the powerful Laravel Blade templating engine to help you reduce visual noise in your templates and write more elegant, concise PHP along with keeping your code DRY with template inheritance.
Sage also embraces the open-source ethos and has a great community of WordPress web development experts that help to continually advance the Sage project not to mention make it a more enjoyable experience when learning Sage for the first time.
Now it’s time to go make something with Sage!